Showing posts with label topaz labs. Show all posts

Thursday, July 09, 2015

One photo, 3 edits


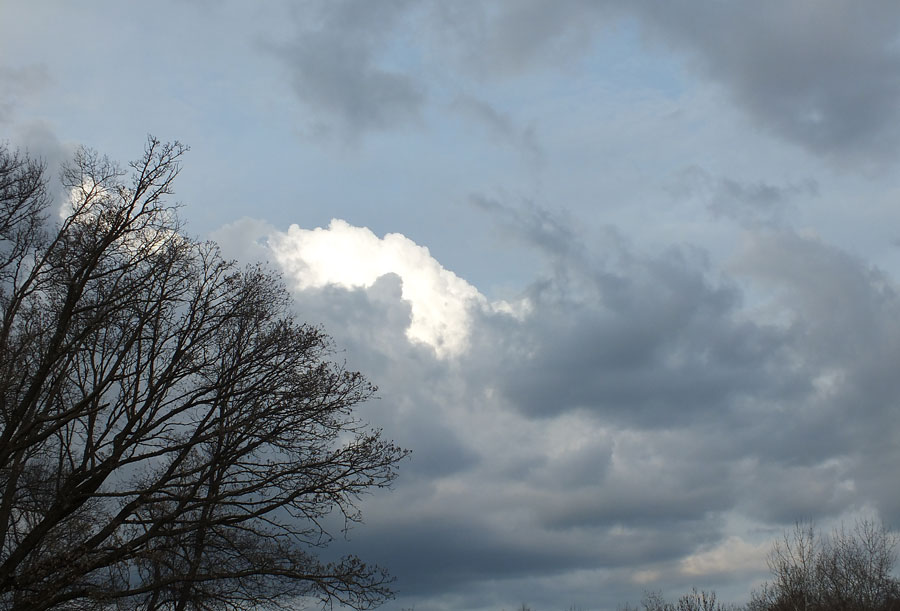
Here is the original photo.  The road presented with a nice curve to the tree and to the clouds above.  So I stopped the car and stepped out to take the shot.

This is a road that I travel often and it is a route I take home.  I noticed the really fantastic sky while driving home from picking up my new glasses.

So I thought about how this road appears to go 'nowhere' and right into the sky.

I used Corel AfterShotPro to for my RAW processing.  I don't always shoot in RAW because it often entails an extra step or two to process a shot and sometimes I just feel lazy.  But since this was a sky shot, I wanted to be able to deal with bringing out the clouds a bit better, the shot in camera was pretty dull.

Most people use Adobe Lightroom, but I like the fact that I don't pay a monthly fee to edit my photos.  I also think this product for me is much faster.

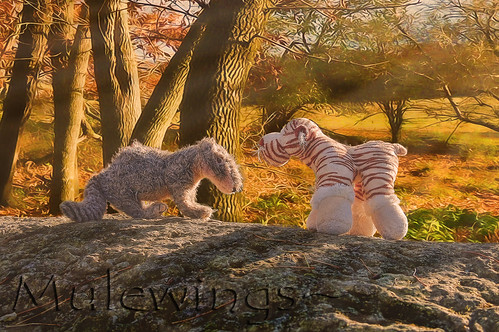
I then edited this shot with Topaz Adjust 5.  I added a bit of detail, enhanced the clouds and reduced some noise.


Now this is a bit more fun and exciting.  More of what I saw in my mind's eye when I was taking the shot.
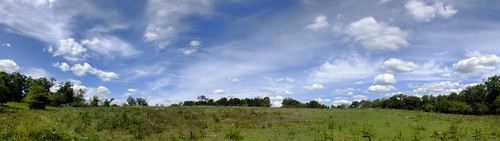
I was also thinking of how nice it would look in Black and White.

So I used Topaz's BW Effects to process the photo.
My photo editing software is now Corel also.

I made the change because again, Adobe which I've used for years is now a monthly fee basis for photo editing.  I suppose I could have gone with the latest Elements, but the price comparison was not even in the ball park with Corel's Paint Shop Pro X7.

Whoops, I didn't mean to make this sound like an ad for either Topaz or Corel, but since I am talking about editing, I thought I'd let you know what I am using to get to these points.  
There are also some fantastic on line editors as well as free editors that you can download.  I'll have to do a separate blog for that.

Here is the black and white version:


I feel that black and white added a lot of drama and punch to this shot.

Then I decided to do something I haven't done in ages.
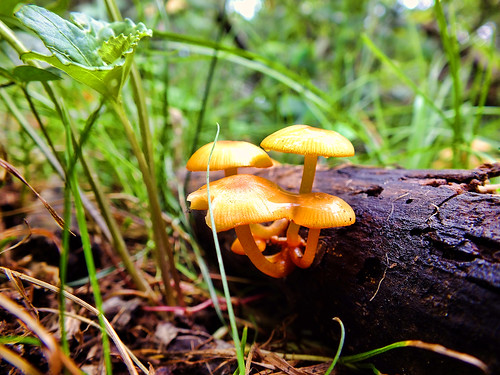
Add a texture layer and edit the black and white version to look as though it had been carried around in someone's wallet, and dropped a few times on the ground.
I thought it would be fun to see what it would look like 'aged'.


And here is the 'aged' photo.  It feels like it has some character to it.

And so there you go.  From my 'vision' in the car to my vision digitally 'remastered'.

Textures Created by Jerry Jones:
AUTHORIZED DOWNLOAD SOURCES:

You can download them FOR FREE at:
http://shadowhousecreations.blogspot.com/
My Official Blog.

You can also find some of my textures at http://www.flickr.com/photos/skeletalmess/
My flickr page.

Monday, May 27, 2013

Topaz Annouces Clarity ~ Clarity Review.

Topaz Labs announces Topaz Clarity!

Well okay.  It is hard to really get much better than there products I use most often which are:
Topaz Adjust 5
Topaz Detail 3
Topaz ReMask
Topaz Simplify 
Topaz B&W 2

Here is an untouched photo of the sky.  It is not a stellar shot, but I wanted to see what Topaz Clarify would do with a fairly mundane shot:

Clarify on Clouds II preset

Adjust with Classic preset:


Then Topaz B&W Classic preset [with 'red' filter]:


If you already have Adjust 5, I'm not sure what Clarify will do for you.  It has some great new bells and whistles that allow you to do 'masking' without leaving the Topaz plug in.
For the above photos I just really hit presets just to get a quick feel for it.

Here are some samples comparing Clarify and Adjust 5, side by side.


Less Halo effect in Clarity without the added work in the above sample.  Richer greens without the extra effort.

In this Hawaiian sunset, the Clarity preset was faster and easier to choose and work with.
With a bit more experimenting the average user could get some fantastic results.

But I am a user of Adjust since the very first version Topaz created...and can quickly achieve the same results.

Clarity clearly has some advantages.  But for me I don't think at the moment I will be able to add it to my Topaz Plugins as I can rapidly get to the same point quickly with the Topaz products I have.

However.  
If you are not one that wants to mess with all of the other plugins, this would be a steal.
Right now Topaz Labs is offering this plug in for $29.99.

On June 1st it will be $49.99.

Sunday, October 28, 2012

The editing of Where's Happy?

With the 'demise' of one of the most favorited toys in our house, I had an idea strike me up alongside the head...literally.
I'd been out of ideas for another book in the line of Morris's Children's Books.

But when I could not find an exact look alike for Happy the Hedgehog and one of my grandchildren had bought Morris a brand spanking new Hedgehog toy...remarking apparently that this new Hedgehog could be Happy's cousin...and....and...
my grandaughter picked up a Frog Toy which quickly became Morris's second favorite toy...

It suddenly started coming together.

Morris wakes up one morning and finds out that Happy the Hedgehog is NOT in the toy-box.  Crazy the Squirrel and Terrible Tiger decide to meet on 'the rock' to discuss where could Happy have gone?  Morris was so sad, they had to do something.

They heard of a Wise old Creature in the Deep Deep Woods that was a Mysterious Old Frog that may be able to help them...

 
So another adventure begins.  Will they find Happy?  What will the Mysterious Old Frog tell them?
What will they have to do?
What awaits them?

Stay tuned! 

I'm using Topaz and Photoshop Elements 5.  In this 'book', I'll be trying to create composites of photos for the effects and illustrations I would like to have appear in the book.
I will rely heavily on layers and going over tutorials by Topaz Labs for ideas. 

Wednesday, October 24, 2012

Review of Topaz Labs Plug ins

I was in the Halloween mood and I had a shot of the neighbor's cat I'd taken while doing a 'shoot' with the neighbor's children.
So here is the starting photograph.

Next I put it in Photoshop 7.0, yes, I have an ancient version, but it still works wonderfully!

I use my preset in Adjust that I call Spooky Adjust.
Next I duplicate the layer and rename it Simplify and it looks like this:
I still want to do something with the fur to make it a bit more abstract looking so I use Clean, again one of my own presets that I've come up while doing animals.  The difference is not much to most people, but to me, it gives a slightly more pleasing effect.
I duplicate this layer and use ReMask to pull just the head of the cat out.
This layer's opacity was reduced because I added Layer 3 with pumkins and Dry Times by Smoko Stock from DeviantArt for texture, along with Layer 4 which are Grunge Frame Brushes from Shadowhouse Creations and then blended it together.

It took quite a bit of experimentation.  At one point I realized that I really wanted the eyes to stand out more and not be covered by the texture or the pumpkins.  So I used the lasso tool to select the eyes from Layer 1, brightened them, and added them back into my 'clean my preset' layer.
 This looked pretty cool and I was very tempted to just stop here.  But I brought back in the other layers.
Here is what all the layers looked like before the finish.

I added some cracks with Obsidian Dawn Brushes [free!] for a bit more texture.  I erased out the Dry Times Texture in spots with a irregular brush with rough edges at about 35%.

Final:


And the before and after !

Sunday, August 19, 2012

A bit more on the FujiFilm FinePix HS 30 EXR

First let me begin with some more 'likes' about this camera.
One very nifty and cool feature I found that I really love a lot is the Auto Panoramic Mode.

Really?  Gosh, it should not be so easy!  Put the camera in Panoramic mode, follow the instructions, and simply hand hold the camera and slowly turn until the camera stops and processes the shot.
Here are 2 shots I did as experiments in the Pano mode at 120 degrees.
Clouds and pasture:
River sunset:

The flip screen.  Some other cameras like the Canon version of this same camera, the Canon SX40 HS 12.1MP Digital Camera has a flip and rotating screen to use.  Nifty, but I wasn't impressed by some of the reviews.
However the FujiFilm camera will flip up to 90 degrees like so [this one was edited for an artistic value]:

And you can tilt it to shoot up.  I like that feature as I can take shots with the camera literally laying on the ground if I want to.
Example of the flip screen in use:
Note the Gorilla Pod underneath, I was doing a 3 exposure shot of the rocks and let the self timer of 10 seconds open the shutter so that I wouldn't 'shake' it in low light.

You can also see the dial on top of the camera.  You have Manual, Aperature, Shutter, Program.  EXR allows some more type of shooting, Full Auto, and two Advanced, Sp1, Sp2, Panoramic, and C.  C lets you customize the settings.  That can be a good feature if you want to set the camera up for a particular kind of shoot.
I'm not going to go through each of the menus as I am still exploring them. 


These are the HDR shots I took in this setting in Manual Mode, Fine JPEG, ISO 100, Auto Bracketing Exposure of 1 step.  I used Photomatix 3 to put the exposures together.


Video is one touch.  I haven't tried the video yet, but expect to do it soon.

I used the continuous mode to 'shoot' my dog ... it takes multiple frames and then you can pick the best one.

This feature doesn't impress me.  The time to record data takes way too long.  My Olympus E-420 can rapid fire and save much faster.  However, I expect I can work with this feature.

The zoom.  Well a good zoom lens costs a lot of $.  These two shots should speak for themselves.

Lastly...to be able to go from Zoom to macro is a real bonus.
No swapping of lenses.

Cons.
The processor takes to long in Continous Mode, AEB Mode, and it seems forever to pull data while shooting an AEB series with RAW + JPEG.

That said, I really can learn to be patient.  But if I am going to do some real hard action, I'll grab either my Nikon D40 [yes old!] or my Olympus E-420.
All around this camera so far is fun and inspiring.
Not having to lug around extra lenses and being able to take bracketed photos while handheld really makes me a happy person.

HDR from the river with zoom ... hand held.  Processed in Photomatix and touched up with Topaz plug-ins.
Happy Shooting!

Friday, July 06, 2012

Obsidian Dawn, Corel Painter Essentials 4, reviews

Combining Corel Painter Essentials 4 [which is free by the way], Elements 5, and a variety of brushes from Obsidian Dawn have driven me in a direction that is a bit different with some of my photography.

Digital Photo Painting.  Yes Corel Painter Essentials 4 is a free program, but that doesn't mean it cannot be well used!  I followed the tutorials that came with the program and then dove into playing with it.
Some results were hideous.
Some results were fantastic.
 
I combined the painting with layers in Elements 5.  No I have not upgraded to the latest version, although I've thought about it.  I get along with '5' so well, that I haven't explored the $ to upgrade.

I decided to add some textures to my digital art by using some interesting brushes from Obsidian Dawn.

This one was particularily fun as I used Obsidian Dawn's 'scratch out' brushes to add texture.  I used layers to bring back the brick on the building and certain places that I wanted to bring the viewer's eye to.

Old crumbling buildings usually don't interest me at all, but this turned out ... in my own opinion, quite cool.  
I may try this technique on some more architectural shots if I can get out and about and take some!

These artistic digital programs give me a whole new choice of creativity to follow.
I've actually combined it with Topaz Lab products in order to prepare the photo for 'painting' in the Corel program.

So if you have some photos and you are not sure what to do with them...or are bored of the same ol', same ol'...try some digital painting.
After all, there is none of the mess, and you never have to clean your brushes!