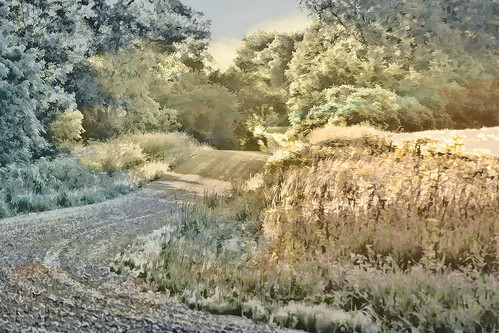
I really didn't want to move the bed in the tiny tiny room because to vacuum under it requires jiggling, lifting, this way and that and then moving the heavy bed a bit more one way and then the other way just to get under it and kill the dust monsters that lurk on the carpet under the bed.
While I was at it, I washed the walls down and changed the bedding.
It was snowing outside and it sounded like hail at the same time.
The weather was nuts. High winds, snow, then sunshine with snow and sunshine with glorious light.
And back to snow.
I stopped and looked through a forgotten album that had photos of my boys in it. It was a mix of dates stuck in a book so that I wouldn't lose them. The photos brought a smile to my face as I sat cross legged and looked through them slowly.
I eventually got back to work and had another bag of 'stuff' to get rid of. If I haven't used something in a long time I need to move it out.
I found a cheap piece of black plastic that I'd used a few times to make reflections with Still Life. I noticed that my hands actually were reflected when I reached for something.
And then I thought.
I wonder if I could take a photo of the reflection of my hands??
There was enough light coming in through the window to give an eerie glow to portions of my skin.
Remember, this is a reflection of my hands palm up towards the window.
So I liked this in a way because it was so different.
I decided to start trying different things with it. I discarded what I was working on and made my own texture and added text to it.
This was the end result of messing around.
I got to here and stopped.
I sat back and then closed the program.
I was done and the image stuck with me. It invoked something I couldn't quite describe, but it felt right.
It was a good experiment for how I'd felt off an on for the past couple of weeks.
Showing posts with label an experiment in textures. Show all posts
Friday, April 10, 2020
Tuesday, February 25, 2020
Knees, Appts, Creativity.
So.
The knee has not resolved itself at all. I just figured I'd get out and 'walk it off'. I went to CrossFit a few times last week and even did the 22WOD. Eh. That may have been a mistake but I was careful. It felt great to do it with my good friend and partner. She is awesome and strong!
The swelling in the knee is gone. For the first time in my life I can really understand what it feels like to have knee pain. See, I didn't want to acknowledge the injury and just figured it would go away like the other time I smashed it against a boulder.
I'm mad at my knee. It should have gotten better. Really.
If I go outside and pull my pants down and yell at it, will it help?
Okay, bad image, right?
Today is going to be one of 'those' days. Calling the VA Community Care folks to see where the claim from 2018 still stands. The hospital just sent a nasty letter which is normal for them. They are a huge conglomerate and of course all phone calls are handled by a person who is 'not' in charge and 'doesn't' know anything.
These phone calls require at least 20 minutes on hold and many transfers.
I think I need an office assistant just for dealing with appointments and care.
Rich is doing mildly better so that bump is resolved for the moment.
~~~~~~~~~~~~~~~~~~
Some fun with editing photos.
Since I am not out hiking at the moment...
I am studying some funky photo effects and editing.
Dispersion Effect:
I really want to nail this down as I think it would be fun. I think instead of 'chunks' of dispersion, I like the birds more. Using bat brushes would be fun too.
Double exposure ~ done in camera:
I need much more experimenting, but it is sort .. of neat!
Pencil sketching skulls:
This is part of my skull collection. I like it, but dislike the white edges that Painter does.
Pencil sketching mixed with the original photo:
I really like this one a...lot.
Well, off to work. The mules want to eat!
The knee has not resolved itself at all. I just figured I'd get out and 'walk it off'. I went to CrossFit a few times last week and even did the 22WOD. Eh. That may have been a mistake but I was careful. It felt great to do it with my good friend and partner. She is awesome and strong!
The swelling in the knee is gone. For the first time in my life I can really understand what it feels like to have knee pain. See, I didn't want to acknowledge the injury and just figured it would go away like the other time I smashed it against a boulder.
I'm mad at my knee. It should have gotten better. Really.
If I go outside and pull my pants down and yell at it, will it help?
Okay, bad image, right?
Today is going to be one of 'those' days. Calling the VA Community Care folks to see where the claim from 2018 still stands. The hospital just sent a nasty letter which is normal for them. They are a huge conglomerate and of course all phone calls are handled by a person who is 'not' in charge and 'doesn't' know anything.
These phone calls require at least 20 minutes on hold and many transfers.
I think I need an office assistant just for dealing with appointments and care.
Rich is doing mildly better so that bump is resolved for the moment.
~~~~~~~~~~~~~~~~~~
Some fun with editing photos.
Since I am not out hiking at the moment...
I am studying some funky photo effects and editing.
Dispersion Effect:
I really want to nail this down as I think it would be fun. I think instead of 'chunks' of dispersion, I like the birds more. Using bat brushes would be fun too.
I need much more experimenting, but it is sort .. of neat!
This is part of my skull collection. I like it, but dislike the white edges that Painter does.
Pencil sketching mixed with the original photo:
I really like this one a...lot.
Well, off to work. The mules want to eat!
Thursday, November 03, 2016
Light Play
I couldn't resist taking some time in the afternoon day to set up my Creative Room of Wonders stuff and try some things out.
Morris had to help of course.
I thought I'd take a shot of what I was doing and the simple things that I set up in the spare bedroom to play with the camera and some lights.
So at first I used the method of trying to get a nearly black backround with just the settings in the camera.
It wasn't hard.
I referenced this article by Glyn Dewis: The Invisible Black Blackdrop Photography Technique.
I didn't totally want the backdrop to be black because I don't have the flash equipment. I thought I'd experiment with his idea and see what I could do.
I moved the exposure so that the photo was nearly black. Then I put my camera on a 2 second delay and used an LED flash light to try and light up the flowers from different angles.
There is my hand right there holding up the flash light.
I took several shots and then put them through my old CS2 photomerge.
This is an archiac way of doing things similar to photo stacking and using 'light painting' at the same time. I was able to mask out my hand and then crop the photo.
I ended up with the following.
Well that was nothing to actually write home about. But, I did get an interesting combined shot. It was worth exploring some more.
I did the same thing with some toys.
This was actually quite fun. The hard part is getting a strong enough flashlight and lighting up the right areas. The above shot is probably 4 or 5 shots combined.
Then I thought, why not use a lamp?
Well I did have fun and I was able to edit out the lamp with masking tools.
However I didn't really think I ended up with anything brilliant here either.
So I took this photo into ON1 10.5 for some fun.
Much better...
I then went back to the other flower photo and decided if I could do anything more impressive.
Not sure if this fits that bill or not.
I would need to totally redo this shot as I missed lighting up the top flower and I think no amount of fiddling or editing will fix that.
But I did learn something important about light painting. Don't move the camera until you have reviewed all of the shots.
However, I did go into back to just concentrating on a nice shot of the blue and white cup.
But of course I came up with 3 versions.
When I get some free time, it looks like it is back to the drawing board for me!
Morris had to help of course.
I thought I'd take a shot of what I was doing and the simple things that I set up in the spare bedroom to play with the camera and some lights.
So at first I used the method of trying to get a nearly black backround with just the settings in the camera.
It wasn't hard.
I referenced this article by Glyn Dewis: The Invisible Black Blackdrop Photography Technique.
I didn't totally want the backdrop to be black because I don't have the flash equipment. I thought I'd experiment with his idea and see what I could do.
I moved the exposure so that the photo was nearly black. Then I put my camera on a 2 second delay and used an LED flash light to try and light up the flowers from different angles.
There is my hand right there holding up the flash light.
I took several shots and then put them through my old CS2 photomerge.
This is an archiac way of doing things similar to photo stacking and using 'light painting' at the same time. I was able to mask out my hand and then crop the photo.
I ended up with the following.
Well that was nothing to actually write home about. But, I did get an interesting combined shot. It was worth exploring some more.
I did the same thing with some toys.
This was actually quite fun. The hard part is getting a strong enough flashlight and lighting up the right areas. The above shot is probably 4 or 5 shots combined.
Then I thought, why not use a lamp?
Well I did have fun and I was able to edit out the lamp with masking tools.
However I didn't really think I ended up with anything brilliant here either.
So I took this photo into ON1 10.5 for some fun.
Much better...
I then went back to the other flower photo and decided if I could do anything more impressive.
Not sure if this fits that bill or not.
I would need to totally redo this shot as I missed lighting up the top flower and I think no amount of fiddling or editing will fix that.
But I did learn something important about light painting. Don't move the camera until you have reviewed all of the shots.
However, I did go into back to just concentrating on a nice shot of the blue and white cup.
But of course I came up with 3 versions.
When I get some free time, it looks like it is back to the drawing board for me!
Monday, March 21, 2016
Still Life week 8
I am working with this self 'instructed' class to better some of my photography skills. I was not an avid fan of Still Life before but I am finding that I enjoy it now.
I am constantly trying to come up with something interesting without getting too heavily invested in things like a light box [although I may build one myself] and other fancy studio things.
Most of the images I try to 'make' or shoot are simply done on the living room floor and with things I find around the house.
Eventually I tossed everything on two wooden boards I'd gotten at a flea market along with my father's wedding ring. After several hits and misses, I ended up deciding that this was the photo of the week.
I was very satisfied with it. I simply edited it with a white vignette around the edges and left it be.
I took this shot below while I was at it and loved all the patterns, but needed to mute the bright red carnations and ... well, it was almost too busy with textures.
This one in color:
This one in muted black and white:
Better but still too busy. And my assignment was for backlighting anyway so I had to go back to the drawing board.
I had to wait for some sunlight and finally we had some. This shot was an accident.
I edited it and added a textured backround to it.
It didn't have all of the elements in it that the assignment suggested so I tried some other things.
This ended up being colorful and soft, more like what the assignment had been.
In the 8th week we are to review what we have done so far.
Apparently I should be able to decide what sort of items work best for me and decide what I need more work on.
However I am still seeking that perfect way to take photos in the living room using available light.
I also need to mention here that I have an assistant who seems to have to inspect everything I do.
Next, I'm going to do some 'dark' work. I really like black and trying to figure out how to use simple black matte cardboard, some glass and figurines to make something interesting.
Sometimes it is more the challenge than anything else.
Thus ends week 8. And no, I haven't found my 'niche' nor have I figured out what works best for me.
I am still experimenting because light and dark fascinate me to no end.
I am constantly trying to come up with something interesting without getting too heavily invested in things like a light box [although I may build one myself] and other fancy studio things.
Most of the images I try to 'make' or shoot are simply done on the living room floor and with things I find around the house.
Last week I used a rug for a backround and draped it over a board. I wanted a soft white textured backround for the shot.
This wasn't what I considered a keeper. It was however interesting to work with the light since it was heavily overcast that day and I didn't have to deal with harsh sunlight coming through the window behind me.
I took out pages from my grandmother's old diaries and set them up with some beads, coffee and my old glasses.
Somehow, this shot looked much nicer in black and white. The pretty colors on the cup seemed to clash with the different colored inks in the pages.
Eventually I tossed everything on two wooden boards I'd gotten at a flea market along with my father's wedding ring. After several hits and misses, I ended up deciding that this was the photo of the week.
I was very satisfied with it. I simply edited it with a white vignette around the edges and left it be.
I took this shot below while I was at it and loved all the patterns, but needed to mute the bright red carnations and ... well, it was almost too busy with textures.
This one in color:
This one in muted black and white:
I had to wait for some sunlight and finally we had some. This shot was an accident.
I edited it and added a textured backround to it.
It didn't have all of the elements in it that the assignment suggested so I tried some other things.
This ended up being colorful and soft, more like what the assignment had been.
In the 8th week we are to review what we have done so far.
Apparently I should be able to decide what sort of items work best for me and decide what I need more work on.
However I am still seeking that perfect way to take photos in the living room using available light.
I also need to mention here that I have an assistant who seems to have to inspect everything I do.
Next, I'm going to do some 'dark' work. I really like black and trying to figure out how to use simple black matte cardboard, some glass and figurines to make something interesting.
Sometimes it is more the challenge than anything else.
Thus ends week 8. And no, I haven't found my 'niche' nor have I figured out what works best for me.
I am still experimenting because light and dark fascinate me to no end.
Saturday, July 12, 2014
Can this shot be Saved?
This is not a great photo, but it is a fair one that I literally snapped because of Siera's reaction to the baby stroller I was pushing when the grand kids were visiting.
Getting a mule to 'pose' with their ears up and pointed is not an easy task when you are actually trying to do a portrait.
So I thought I'd occupy myself while the rain came down outside and try a different technique. I thought I'd mix the shot up with some textures and see what happened.
Most of the time I end up totally making a mess.
First off I can do this in either PSPX6 or Photoshop...a person can almost any version that uses layers including Elements.
You can 'cut out' your image with any sort of selection tool. I use Topaz ReMask because it just is so much easier for me. Quick draw the line click the red bucket and compute.
Next I grabbed a 'texture' from Jerry Jone's site called Attic Treasures at Shadow House Creations.
Notice that I haven't done anything but drop the texture on top of the poor mule. Before I get too involved I want to experiment with layer opacity and first. If it looks half way decent, I might just use it.
Well it does look nice with her colors but I'll swap layers again and try some things to get rid of the green that is hanging on her face from the original ...
and perhaps crop it also.
After a bit of playing around with the layers, I found one that seems to work well.
I get rid of the green by using a mask tool. Older Elements users can just carefully erase around the animal.
I wasn't quite satisfied with the look I was getting. True enough, it does look like a funky old framed photo that one could find in the attic.
But I wanted something more.
So I dug around in my files and found a fall photo which matched the colors I was using.
I dropped it into the layers and began to move it around a bit.
Notice that I have made it so you cannot see the bottom layer which is the original photo.
I decided that I like the way the trees frame the mule within the frame.
This will be where I should save the file as PSD so I can work on it later, then I crop it and flatten it.
I added a black border and my name at the bottom to finish it off.
I think it is a keeper.
It went from a so-so crappy point at the mule and snap shot to something I wouldn't mind having on my screensaver or on my calendar next year.
Color me happy.
It was worth trying out something different on a day where it is raining and I can't be out hiking or riding.
Sitting back and looking at this ... I realize that I could have moved the mule a bit to more to the right.
And since I did not save the PSD file I would have to go through these steps again.
Lesson learned! Save your work!
Here is something else I did with editing.
I used Topaz Simplify, Clean, and then overlayed the photo of a sunset on top of the 'creation'.
It was fairly well received and someone even may have called it artistic.
I'm not sure I'd go that far, but keeping your editing skills up to par with new things is always a good plan.
Monday, October 15, 2012
Making my own Texture for photo overlay...
a photo of leaves that I'd shot just last week... I monkeyed around with opacity of the layers... and added some 'noise' in the form of grain [Elements filters] and came up with this.
Next I took a prospective shot that I'd like to try a bit of my own layering on.
Original:
Surely these do NOT look like a combination should do anything. But I decided to try anyway.
What I ended up with was something a bit warmer and nicer than the original shot and if you look closely you can see some texture. I did use a layer mask to bring out the bright red of the leaves on the lower right and the true color of the berries. I think it is nice and subtle.
Final:
Subscribe to:
Posts (Atom)